
Continuing our "How to" series on research techniques in Recollective, this article takes a look at a qualitative favorite: using imagery and visual stimuli to understand your participants' perceptions through collaging.
In this article, we will cover three different Recollective Task types that you can use for collaging and provide considerations to help you decide which one would work best in different use case scenarios.
More specifically, you will learn:
- What is a collaging exercise
- Photo upload method
- Sort and Rank method
- Image Review method
- How to choose the right method
What is a collaging exercise?
Put simply, a collaging exercise provides participants with the opportunity to select a series of images and combine them to produce a visual representation of their thoughts or feelings regarding any given topic you are looking to explore: this might be an experience, a concept, an idea, or even an object.
Fundamentally, a collaging exercise is actually very simple: as long as your participants have access to images, whether provided by you or by themselves, you can have them do a collage. Conducting this exercise online further opens the doors to creativity, as participants have the entire internet at their disposal through which they can search for images or graphics.
When setting up an online collaging exercise, you have the choice to either provide a series of images to the participants to choose from, or you can ask them to search for and select images independently. Recollective’s myriad of Task Types provides you with a number of different collaging options that let you get exactly the data you’re looking for to enhance your final report. Let's explore those in more detail now…
Method 1: Photo Upload Task
One of the easiest and most open-ended ways to support your collaging needs is to use a Photo Task. This Task type allows participants to upload photos, whether their own or sourced elsewhere. Depending on the technical proficiency of your participants and the data you’re looking for at the end of the project, there are actually two ways you could leverage the photo upload task for a collaging exercise:
Option 1
The first and easiest option with this Task type is to ask participants to upload a series of individual photos that they want to include as part of their collage. As part of the Task, you have the option to ask for a caption or description alongside each photo, where participants can explain in detail what that photo represents and why they chose to include it in their collage.

This ability to get an individual explanation of each photo means you can get specific, granular data from the exercise, which, in some cases, is exactly what you need. Your output is a series of photos from each participant, all of which are available to export, along with text captions for each that can be excerpted just like the rest of your text-based responses—which means you can quickly and easily pick and choose what you need for your report, and put something together for your clients that is most representative of the results from all participants.
Option 2
The second option is to ask participants to create and upload a single photo collage. That means asking them to do more of the work externally: select the photos, combine them into one image using the software of their choice, then upload that final image as their collage. While this method does rely on some technological proficiency from your participants, the proliferation of apps and tools for easy photo editing available these days is making this an increasingly viable option for participants of all audiences.
As noted above, you can ask for a text-based photo description or caption where participants can detail their thoughts about their collage:

This method, with a single photo and a single text response for you to go through, is perhaps the simplest for you as a researcher in terms of your analysis, both because the information is so condensed and because text and photo responses don’t require any advanced analysis. Your output is, quite simply, a series of photos and descriptions of those photos, one per participant; the photos, again, can be exported to drop directly into your report, and the descriptions can be excerpted and wrapped into the rest of your text-based analysis.
For both options, you can choose to have participants use photos that you pre-selected or have them search for their own. If you have photos for them, you can simply upload them to the task instructions for them to download; if you want them to search, Recollective even has a stock photo library accessible from right within the platform to make finding photos a breeze for your participants:

Method 2: Sort and Rank Task
The Sort and Rank Task option is best used when you want to have a more close-ended collage and are looking to gather a little more quantitative data from the exercise in addition to the qualitative element.
Sort and Rank Tasks involve the presentation of “Cards” to participants, which they are asked to sort into “Groups” and then rank within those groups. To conduct a collaging exercise with this task, you’ll upload your pre-determined images onto the cards, and ask participants to select cards to add into a single group you create. Then, you can ask them to rank the images within that group so that the most representative image is placed at the top of the pile, and the least representative image is placed at the bottom.

The Sort and Rank Task also allows you the opportunity to ask a follow-up text question on the same page with the exercise, so after participants have selected and ranked all their images, they can provide you with a text-based explanation of their selections and rankings.
This setup helps emulate the sizing portion of a collaging exercise, where participants might ensure that the largest photo in the collage is the most representative of their thoughts and the smallest is the least representative; in this setup, rather than receiving larger or smaller images, you’re simply getting ranking data for the images.
One of the great things about this method is that, for one thing, it’s both easy and engaging for participants. The Sort and Rank can best be described as a fun task: it has plenty of visual appeal, and the interactive nature of dragging and dropping cards makes it enjoyable for participants.
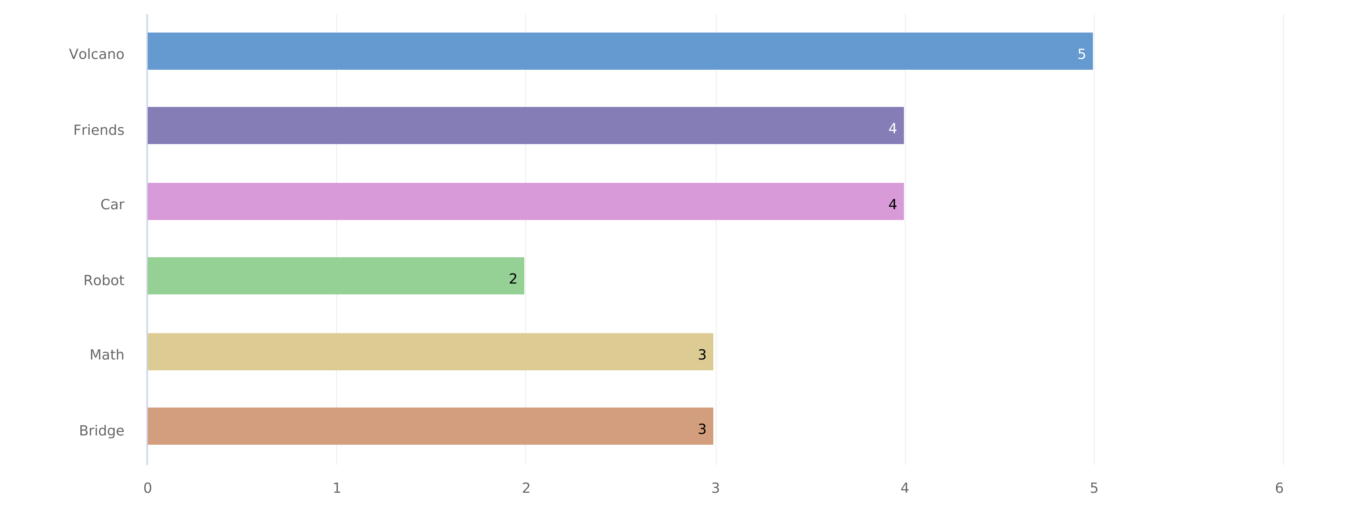
In terms of output, this setup of the Sort and Rank has a couple of different options: the simplest yield is, first of all, a chart providing a count of the number of times each card was used:
To supplement that, you’ll get a table that shows an average ranking for each card used, with which you can quickly identify the most highly rated options:

More granular is the response data table that will show you each card selected by each participant, as well as its ranking in each response.

For the most qualitative and visual results, though, you’ll actually just want to look at the individual response pages of each participant to see each “collage” in context, which you can easily screenshot and save to add to your report or to directly compare to other responses.

Collaging Method 3: Image Review
The last collaging option we’ll look at today is the Image Review method. This method is quite different from the other two; in fact, it's almost the inverse. For this method, instead of asking participants to select images to create their own collage, you’re providing them with a collage and asking them to mark their perceptions or associations based on the question at hand.
The Image Review Task leverages your classic selection of emojis in the creation of “markers” that are provided to participants for use in the Task. As they complete it, participants will be asked to select an appropriate marker and place it on the image like a pin; alongside each marker, they can leave a comment to explain their selection and placement of the emoji:
When setting this up, you can create as many markers as you need to allow participants to address the question(s) you're asking. At its most basic, you can use one marker to simply represent their selection, as you can see in the image above. You might allow them to use that marker once, if you only want them to select one image, or you can allow them to use it multiple times to select as many images as they need to capture their full perspective. You can also set up multiple markers to represent different things—for instance, you might ask them to associate the images with a series of brands, each represented by a unique marker.
This is another great option for a situation where you want to be more close-ended about the exercise, but the real advantage here is actually the dramatically different output. While the previous methods provided you with either a large number of images to sift through or with a series of charts and tables filled with distribution and ranking data, the image review output provides a heat map of all the markers as a single image that you can export and drop directly into your report. This gives a dynamic and engaging tool with which to help illustrate the results:

Alongside that is a table of markers that shows you each one that was placed, where it was placed, along with the comment that was left with it:
Choosing your Method
While all three methods are variations of a standard collaging exercise, each is dramatically different enough to help you select what will work best for your project.
When making your selection, it is useful to keep the following in mind:
- Whether you want the exercise to be open-ended or close-ended
- The experience you want for your participants
- The output that you are looking for
Let's take a look at each of these factors as they relate to each setup option:
Photo Task
The Photo Upload option is, of course, the most open-ended, whether you're asking for one or multiple photos: in either case, you're leaving it open to participants to decide which photos to use. To make it more closed-ended, though, you could upload a series of photos to the Task instructions for participants to download and use; overall, though, if you're looking to create a close-ended task, you're better off going with one of the other two task types.
Option 1: The multiple photo upload option has an output that is equally simple and straightforward, but, due to the increase in volume from each response, is certainly not as quick to review. The tradeoff for that, though, is the increased granularity in the data you receive, as well as being quite easy (if a little time-consuming) for participants to complete.
Option 2: The single photo upload option, yields a simple, straightforward output that is quick and easy to review. However, as mentioned above, the single-photo upload option relies on a certain level of technological familiarity from participants, and as such, may not be a feasible option for some target audiences.
Sort and Rank Task
The Sort and Rank option is both close-ended and fun and easy for participants to complete.
In terms of output, the Sort and Rank output is the most quantitative: you’ll have data tables to go through, export and analyze to your heart’s content. Getting a visually engaging output from the Sort and Rank is possible, but more manual and time-consuming than it is for either the Image Review Task or the Photo Task; the visual version of the output is also not consolidated like it is for the Image Review, and so may require you to use an external tool to create a consolidated image of the output rather than getting one to export directly from the platform.
Image Review Task
The Image Review option is similar to the Sort and Rank in terms of its close-endedness and the fun, easy participant experience it provides.
The output, however, has less to offer in terms of quantitative output. But if your priority is to get a single, consolidated image that represents all participant responses - then this is your best bet. It also has the advantage of allowing a comment per marker, which, like the multiple photo upload option, means you can get more granular with the qualitative, text-based feedback you receive alongside the imagery.
All that said, as with most research techniques, there is no wrong way to set up a collage exercise in Recollective; ultimately, the “right” way is the one that meets the needs that are a priority to you. It's all about knowing the options available to you so that you can make an educated decision when the time comes.
As always, feel free to reach out to our team if you have any questions or need help determining which method could be right for you!


.svg)